Asobu Cold Brew Instructions: A Comprehensive Guide
Asobu simplifies enjoying smooth, delicious cold brew year-round with its innovative brewers! Explore their collection, from pour-overs to insulated tumblers, designed for modern lifestyles․
Asobu has rapidly become synonymous with convenient, high-quality cold brew coffee preparation․ For over two decades, the brand has innovated drinkware, initially pioneering BPA-free Tritan bottles in Canada and consistently pushing design boundaries․ Their philosophy centers around creating more than just vessels; Asobu crafts experiences for modern, active individuals․
The appeal of Asobu cold brew lies in its simplicity and the superior flavor it unlocks․ Unlike traditional hot-brewed coffee, cold brewing extracts coffee flavors slowly over time, resulting in a remarkably smooth, less acidic concentrate․ This concentrate can then be enjoyed straight, diluted with water or milk, or even used as a base for creative coffee cocktails․
Asobu’s Copper Cold Brew Maker, in particular, has garnered attention for its ease of use and ability to consistently deliver exceptional results․ Whether you’re a seasoned coffee aficionado or a newcomer to the cold brew world, Asobu provides the tools to “Brew it your way!”
What is Asobu and its Drinkware Philosophy?
Asobu is a premium drinkware brand dedicated to enhancing the lifestyles of modern men and women on the go․ Established over 20 years ago, the company initially distinguished itself by introducing the first 100% BPA-free Tritan bottles to the Canadian market․ This commitment to safe, innovative materials remains central to their ethos․
However, Asobu’s philosophy extends far beyond simply providing containers․ They view their products as integral components of daily routines, designed to support active and hydrated living․ From insulated tumblers and stylish coffee mugs to beer coolers and, notably, cold brew makers, Asobu aims to elevate every sip․
Their ongoing design process reflects a dedication to both functionality and aesthetics․ Asobu doesn’t just create drinkware; they craft solutions that seamlessly integrate into busy lives, offering durability, style, and a commitment to quality in every product․ It’s about more than a bottle; it’s a lifestyle․
Benefits of Asobu Cold Brew Makers
Asobu Cold Brew Makers offer a superior method for crafting incredibly smooth and flavorful coffee concentrate at home․ Unlike traditional hot brewing, cold brewing minimizes acidity, resulting in a naturally sweeter, less bitter taste – perfect for those sensitive to stomach upset or simply preferring a milder profile;
The innovative design of Asobu’s brewers simplifies the process, eliminating the need for complex equipment or lengthy preparation․ They allow for convenient, customizable brewing, letting you control the strength and flavor to your exact preference․ Enjoying café-quality cold brew is now effortlessly achievable in your own kitchen․
Furthermore, Asobu brewers are designed for ease of use and cleaning․ Their durable construction ensures longevity, while the concentrated brew allows for versatile serving options – enjoy it hot or cold, diluted with water or milk, creating endless coffee possibilities․ It’s a convenient and cost-effective alternative to daily coffee shop visits․
Getting Started: Materials and Preparation
To begin, gather your materials: ground coffee (3oz), cold filtered water (3 cups), and your Asobu brewer․ Proper preparation ensures a delicious, smooth cold brew experience!
Required Materials: Coffee, Water, Asobu Brewer
Embarking on your Asobu cold brew journey requires just a few essential components․ First, you’ll need high-quality coffee grounds – approximately 3 ounces is a great starting point for a batch․ The type of coffee is entirely up to your preference, but a medium to coarse grind is generally recommended for optimal extraction․
Next, you’ll require cold, filtered water․ Using filtered water significantly impacts the final flavor profile, removing impurities that can detract from the coffee’s natural taste; Three cups of water are typically used in conjunction with the 3 ounces of coffee grounds․
Finally, and most importantly, you’ll need your Asobu cold brew maker! These brewers are specifically designed for the cold brew process, offering a convenient and efficient way to create a smooth, less acidic coffee concentrate․ Ensure your Asobu brewer is clean and ready for assembly before you begin․ With these three elements, you’re well-equipped to start brewing!
Coffee Grind Size for Optimal Cold Brew
Achieving the perfect cold brew hinges significantly on the coffee grind size․ Unlike hot brewing, cold brew benefits from a coarser grind․ A medium-coarse grind, resembling coarse sand, is generally considered ideal for Asobu brewers and similar cold brew systems․ This prevents over-extraction, which can lead to a bitter and muddy flavor profile․
Finer grinds, typically used for drip coffee, will result in excessive extraction during the extended steeping process․ This leads to a harsh, unpleasant taste․ Conversely, a grind that is too coarse may result in under-extraction, yielding a weak and watery brew․
Experimentation is key, but starting with a medium-coarse grind provides a solid foundation․ Adjust slightly based on your taste preferences and the specific Asobu brewer model you are using․ Remember, a consistent grind size is crucial for even extraction and a balanced, flavorful cold brew․
Water Quality and its Impact on Flavor
The quality of water used in your Asobu cold brew significantly impacts the final flavor profile․ Cold brew, with its long steeping time, readily absorbs impurities present in the water․ Therefore, using filtered water is highly recommended․ Avoid using tap water directly, as chlorine and other chemicals can negatively affect the taste, resulting in a less clean and enjoyable brew․
Ideally, opt for filtered water that has been specifically designed for coffee brewing․ This ensures minimal mineral content and a neutral pH balance․ Distilled water, while pure, lacks the minerals necessary to properly extract flavor from the coffee grounds, potentially leading to a flat taste․
Investing in a good water filter is a small step that yields substantial improvements in your Asobu cold brew’s overall quality and clarity․ Remember, approximately three cups of cold filtered water are needed for a standard batch․
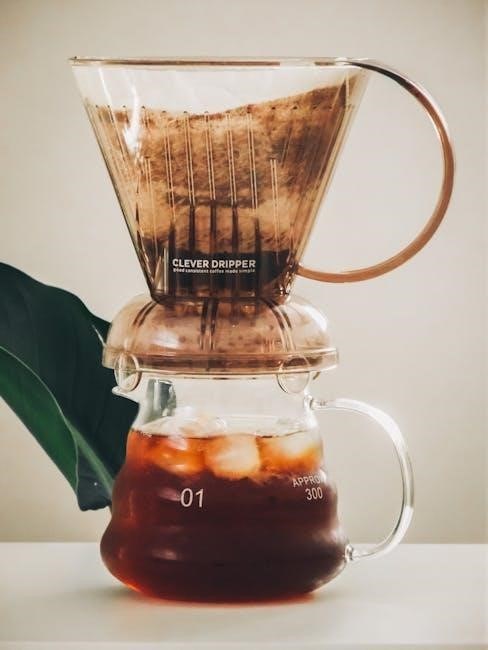
The Asobu Cold Brew Process: Step-by-Step
Begin by assembling your Asobu brewer, adding three ounces of medium/coarse ground coffee, and slowly pouring in three cups of cold, filtered water․
Step 1: Assembling the Asobu Cold Brew Maker
Successfully initiating the cold brew process with your Asobu brewer begins with proper assembly․ Carefully unpack all components, ensuring you have the brewer body, lid, and the fine mesh filter already integrated within the unit․
Begin by inspecting the brewer for any damage․ Next, gently screw the lid onto the brewer body, ensuring a secure, watertight seal․ This is crucial for preventing leaks during the steeping process․ The mesh filter should remain securely in place within the brewer; it’s designed to contain the coffee grounds during infusion․
Double-check that the filter is properly seated to avoid sediment in your final brew․ A correctly assembled Asobu Cold Brew Maker is the foundation for a consistently smooth and flavorful cold brew experience․ Take your time with this initial step – a solid assembly guarantees optimal performance!
Step 2: Adding Coffee Grounds to the Brewer
With your Asobu Cold Brew Maker assembled, the next step is introducing the coffee grounds․ A general guideline suggests using approximately 3 ounces (around 85 grams) of coarsely ground coffee for every 3 cups (710ml) of water․ However, adjust this ratio to suit your preferred strength․
Carefully pour the measured coffee grounds directly into the brewer, ensuring they are evenly distributed within the mesh filter․ Avoid overfilling; leave some space at the top to prevent overflow when adding water․ Gently shake the brewer to settle the grounds and eliminate any air pockets․
Using a coarse grind is vital for cold brew, as it minimizes sediment and produces a cleaner, smoother flavor․ Finer grinds can clog the filter and result in a muddy brew․ Take care not to compress the grounds; a loose fill allows for optimal water circulation and extraction․
Step 3: Pouring Water Over the Coffee Grounds
Now, gently pour cold, filtered water over the coffee grounds within the Asobu brewer; Aim for a slow and even saturation, ensuring all the grounds are thoroughly wetted․ Begin by adding a small amount of water to bloom the coffee – this allows it to degas and release trapped carbon dioxide, enhancing the flavor․
Allow the coffee to bloom for about 30-60 seconds before continuing to pour․ Then, slowly add the remaining water, filling the brewer to the desired level․ Avoid pouring directly onto the mesh filter; instead, aim for the coffee grounds themselves․ This helps maintain a consistent extraction․
Using filtered water is crucial, as impurities in tap water can negatively impact the final taste․ Ensure the water is cold, as heat can accelerate the brewing process and alter the flavor profile․
Step 4: Securing the Lid and Initial Steeping
Once all the water has been added, carefully secure the lid onto the Asobu cold brew maker․ Ensure it’s tightly sealed to prevent any leaks or unwanted oxidation during the steeping process․ The lid’s secure fit is essential for maintaining the integrity of the brew and preserving its flavors․
With the lid in place, gently invert the brewer a couple of times to ensure all the coffee grounds are fully submerged in the water․ This promotes even extraction and a more consistent flavor profile․ Now, it’s time for the initial steeping phase – the heart of cold brew creation!
Place the Asobu brewer in the refrigerator or a cool, dark place to begin the long, slow extraction process․ Avoid direct sunlight or fluctuating temperatures, as these can affect the quality of the brew․
Steeping and Brewing Time
Optimal steeping varies based on desired strength․ Generally, 12-24 hours is recommended․ Temperature and grind size also influence extraction; experiment to find your perfect brew!
Recommended Steeping Time for Different Strengths
Achieving your ideal cold brew strength with an Asobu brewer hinges on steeping time․ For a milder, less concentrated brew, a steeping period of 12-16 hours is generally recommended․ This shorter duration yields a smoother, more delicate flavor profile, perfect for those who prefer a lighter coffee experience․
If you desire a standard, balanced cold brew, aim for a steeping time of 18-20 hours․ This timeframe allows for a robust extraction of flavors, resulting in a well-rounded and satisfying cup․ Many cold brew enthusiasts find this duration to be the sweet spot for everyday enjoyment;
For those who crave a bold, intensely flavorful cold brew concentrate, extending the steeping time to 24 hours or even slightly longer is the way to go․ This prolonged extraction maximizes the coffee’s potential, creating a potent concentrate ideal for dilution or crafting specialty coffee drinks․ Remember to adjust dilution ratios to your preference when using a longer steep time․
Ultimately, experimentation is key! These are guidelines, and personal taste should always prevail․
Factors Affecting Steeping Time (Temperature, Grind Size)
Several factors influence the optimal steeping time when using your Asobu cold brew maker․ Water temperature plays a crucial role; cold water extracts flavors more slowly than warmer water, necessitating longer steeping times․ Maintaining consistently cold water throughout the process is vital for a smooth, less acidic brew․
Grind size is equally important․ A medium-coarse grind is generally recommended for Asobu brewers․ Finer grinds can lead to over-extraction and a bitter taste, even with shorter steeping times, while overly coarse grinds may result in under-extraction and a weak brew․
Ambient temperature also has a subtle effect․ Warmer room temperatures can slightly accelerate extraction, potentially shortening the required steeping time․ Conversely, colder temperatures may necessitate a longer steep․
Finally, coffee bean origin and roast level impact extraction rates․ Denser beans and darker roasts often require slightly longer steeping times to fully develop their flavors․ Adjust your steeping time based on these variables to achieve your desired taste․
Filtering and Serving
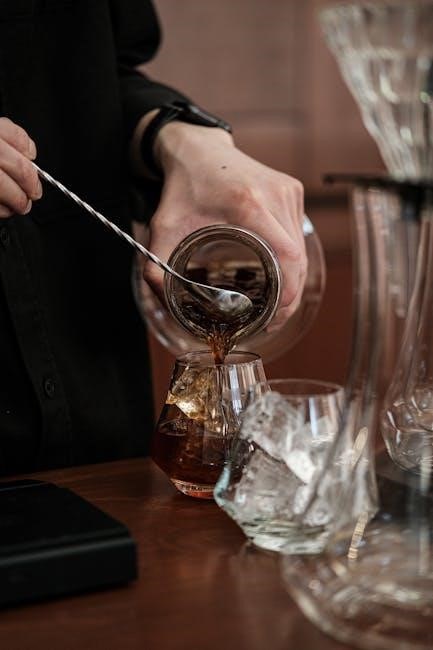
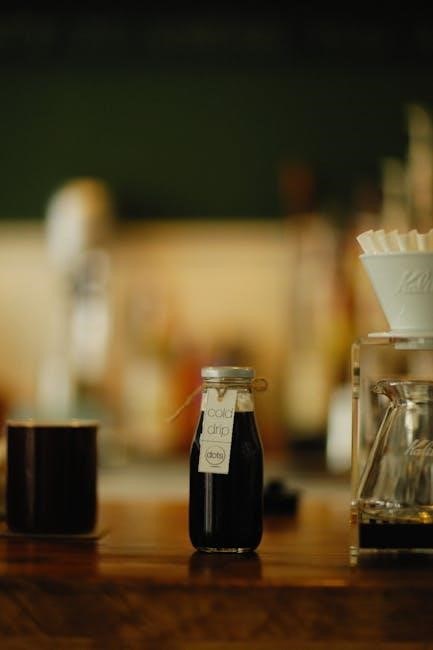
Remove the Asobu filter, discarding the used coffee grounds․ Dilute the concentrated cold brew with water or milk to your preference, and enjoy it hot or cold!
Removing the Filter and Discarding Grounds
Once the steeping process is complete, carefully remove the Asobu cold brew maker’s filter assembly․ This typically involves unscrewing or lifting the filter component from the brewing container․ Be mindful, as the filter will be holding the saturated coffee grounds, and some dripping may occur during removal․
Gently shake off any excess liquid back into the brewing vessel to maximize your yield․ Then, carefully dispose of the spent coffee grounds․ These can be composted for garden use, or simply discarded in the trash․ Avoid pouring grounds directly into your sink drain, as they can cause clogs․
Thoroughly rinse the filter assembly under running water to remove any remaining coffee particles․ This will help prevent buildup and ensure optimal performance for future brewing sessions․ A quick rinse immediately after use makes cleaning significantly easier․ Ensure all grounds are removed before proceeding to the dilution stage․
Dilution Ratios for Concentrated Cold Brew
Asobu cold brew makers produce a concentrated coffee extract, requiring dilution before serving․ The ideal ratio depends on your preferred strength․ A common starting point is a 1:1 ratio – equal parts cold brew concentrate and cold water or milk․
For a milder flavor, experiment with a 1:2 or even 1:3 ratio, using more water or milk per part of concentrate․ Those who enjoy a bolder, more intense coffee experience may prefer a 3:1 ratio, using less diluent․
Consider adding ice to your diluted cold brew for a refreshing chilled beverage․ Adjust the dilution to compensate for the melting ice, maintaining your desired strength․ Taste-testing is crucial! Begin with a small amount of concentrate and gradually add diluent until you achieve your perfect cup․ Remember, these are guidelines; personalize to your palate!
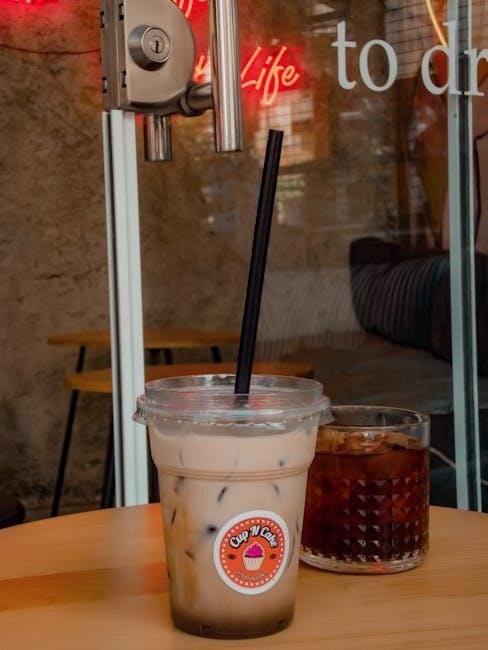
Serving Suggestions: Hot or Cold
Asobu cold brew is incredibly versatile! While traditionally enjoyed cold, the concentrate can be heated for a unique hot coffee experience․ To enjoy hot, gently warm the concentrate – avoid boiling, as this can alter the flavor profile․ Dilute with hot water or milk as desired, following the dilution ratios previously discussed․
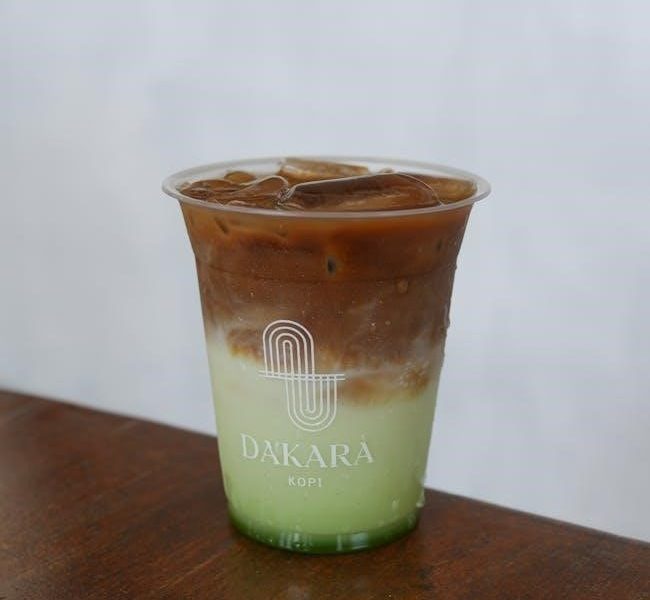
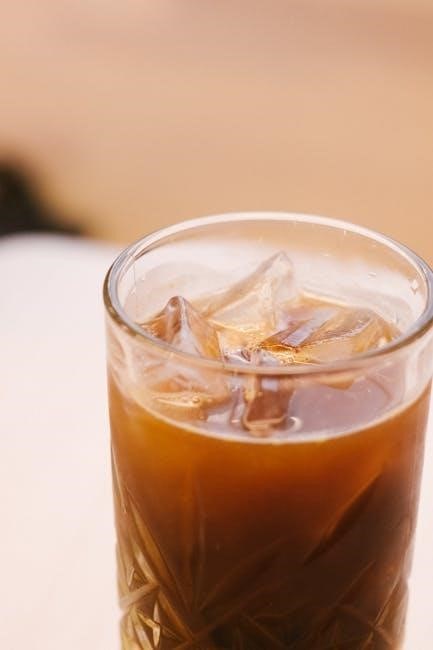
For a classic cold brew, serve over ice with your favorite milk or creamer․ Enhance with flavored syrups, such as vanilla or caramel, for a customized treat․ Cold brew also makes a fantastic base for coffee cocktails and blended drinks․
Experiment with different toppings like whipped cream, chocolate shavings, or a sprinkle of cinnamon․ Asobu’s drinkware keeps your beverage at the perfect temperature, whether enjoying a refreshing iced brew or a comforting hot cup!
Cleaning and Maintenance

Proper cleaning ensures longevity of your Asobu brewer․ Regularly disassemble and wash all parts with mild soap and water․ Store it dry for optimal quality․
Proper Cleaning Procedures for Asobu Brewers
Maintaining your Asobu cold brew maker is crucial for consistently delicious results and extending its lifespan․ After each use, promptly disassemble all components – the brewer body, filter, lid, and any seals․ Hand washing is highly recommended to prevent damage from harsh dishwasher detergents․
Use warm, soapy water and a soft sponge or brush to thoroughly clean each part․ Pay close attention to the filter, ensuring all coffee grounds are removed․ A small brush can be particularly helpful for this․ Rinse all components meticulously to eliminate any soap residue․

For stubborn stains or buildup, a solution of baking soda and water can be used․ Allow it to soak for a short period before scrubbing gently․ Ensure complete rinsing afterward․ Avoid abrasive cleaners or scouring pads, as they can scratch the surfaces․
Finally, allow all parts to air dry completely before reassembling and storing your Asobu brewer․ This prevents mold or mildew growth and ensures it’s ready for your next cold brew adventure!
Storage Recommendations to Maintain Brewer Quality
Proper storage is key to preserving the quality and longevity of your Asobu cold brew maker․ After thorough cleaning and complete drying, store the disassembled components in a cool, dry place, away from direct sunlight and extreme temperatures․ Avoid storing in damp environments, as this can promote mold or mildew growth․
Ideally, store the brewer in a breathable container or bag to allow for air circulation․ This prevents odors from being absorbed and helps maintain freshness․ Avoid tightly sealing the components, as this can trap moisture․
If you’re storing the brewer for an extended period, consider placing a desiccant packet inside the container to absorb any residual moisture․ Regularly inspect the brewer for any signs of damage or deterioration․
Following these simple storage recommendations will ensure your Asobu cold brew maker remains in optimal condition, ready to deliver consistently delicious cold brew whenever you desire!
Troubleshooting Common Issues
Weak Cold Brew: If your cold brew lacks strength, increase the coffee-to-water ratio or extend the steeping time․ Ensure you’re using a coarse grind, as finer grinds can lead to over-extraction and bitterness, but not necessarily strength․
Bitter Taste: Bitterness often results from over-extraction․ Reduce the steeping time or use a coarser coffee grind․ Ensure water quality is optimal, as impurities can affect flavor․
Slow Filtering: A clogged filter is a common issue․ Ensure the filter is properly seated and not damaged․ If clogging persists, try using a different filter or pre-rinsing the filter before use․
Leaks: Check that all components are securely assembled․ Inspect the seals for any damage or wear․ If leaks continue, contact Asobu customer support for assistance․
Regular maintenance and attention to these potential issues will ensure a consistently enjoyable cold brew experience with your Asobu brewer!